Time to get data out of your machine! Following this guide you we’ll help you get your first datapoints from your machine.
Step 1
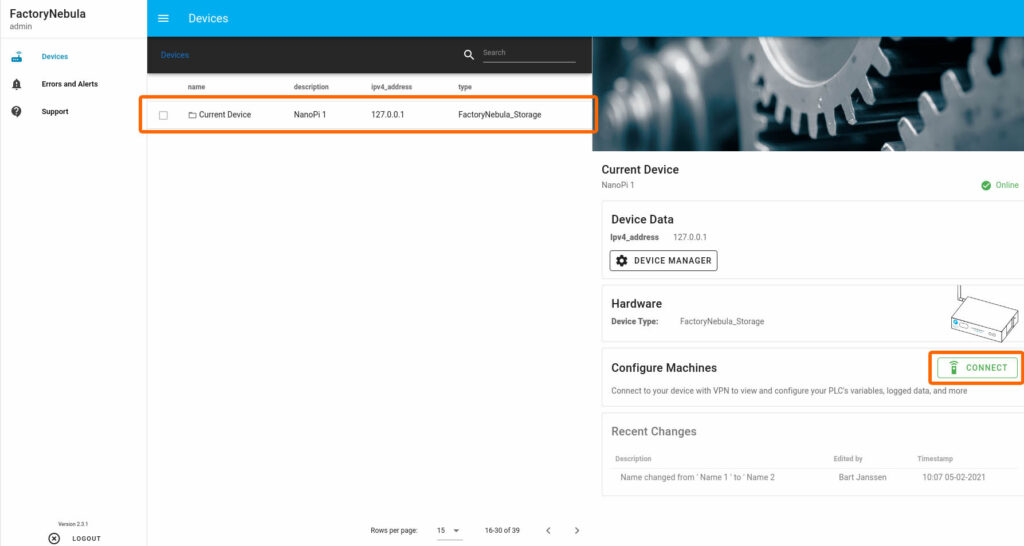
Connect to yout FactoryNebula Worker by going to your configured IP address (default 192.168.1.1), and login using your credentials. When here, click on ‘Current Device’, a side panel will open. In this panel, click on ‘Connect’.
Step 2
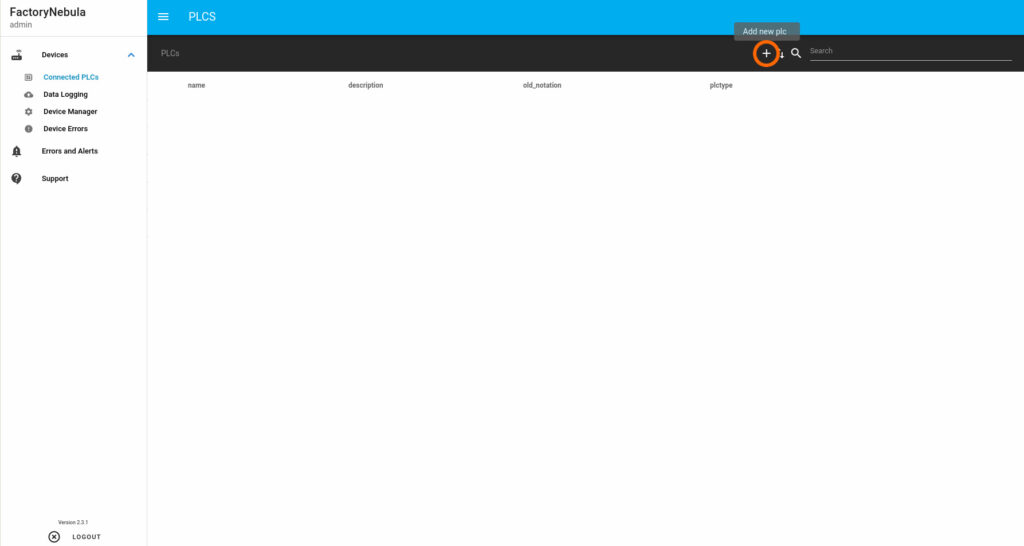
You are now connected to your device. If you’ve not configured any PLCs yet, start by adding a new PLC by clicking the ‘+’ button. Make sure you enter your PLC’s configuration data correctly, or the machine might be unreachable.
Step 3
Click on your newly added PLC to add the variables that are in the PLC. For this you need the PLC’s configuration. You can also create categories here.
Step 4
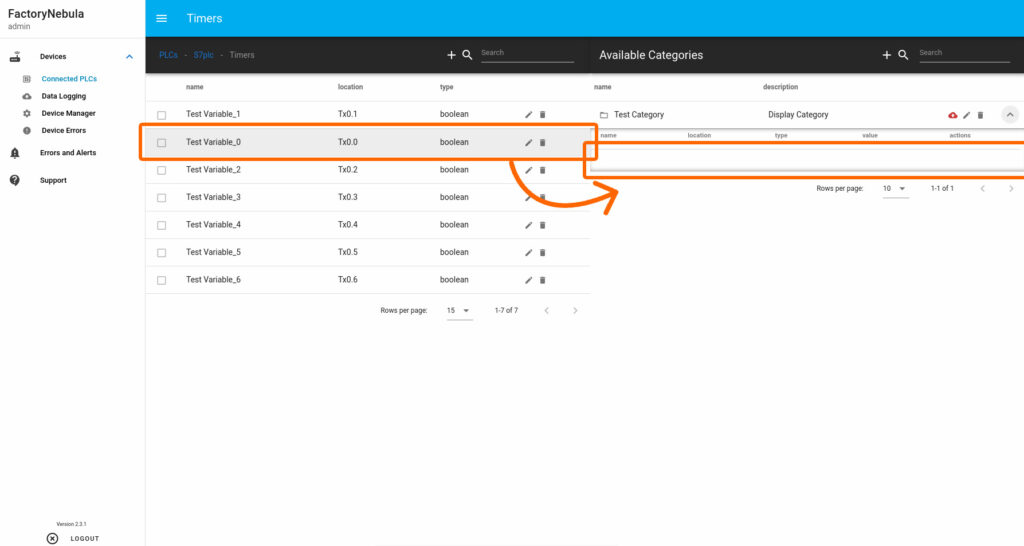
Once you’ve added variables and categories, you can add a variable to a category by expanding the category and dragging the variable into it.
Step 5
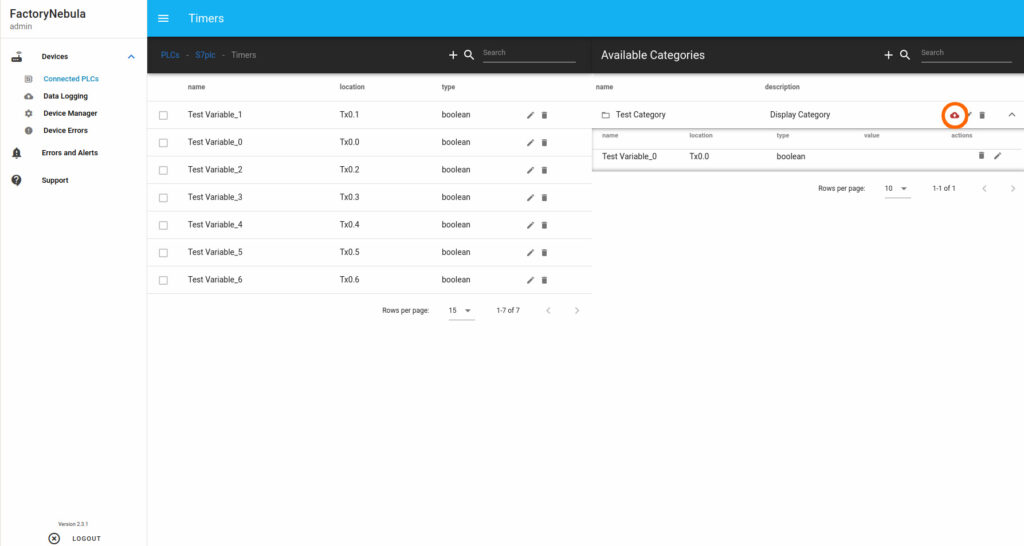
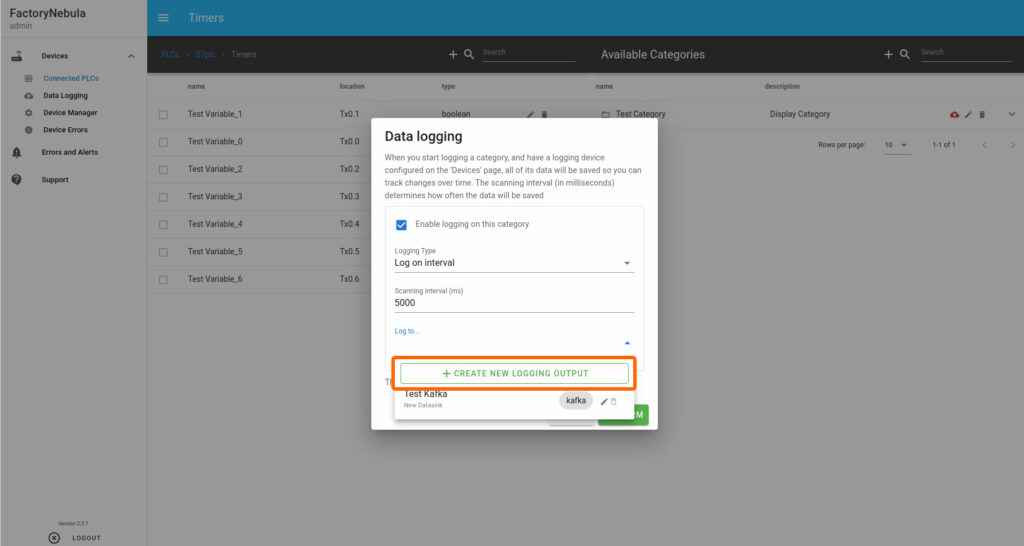
Once you’ve added variables to your category, you can click on the cloud icon and select how you want to log it, and where you want to log your data to.
Step 6
If you’ve not created any datasinks to log your data to, you can create one here. You can log data to one, or multiple datasinks. The logging icon will become green if the category is being logged.
All done!
Step 7
Congratulations, your data is now being sent to your datasink. Want to see your data, or do you need help setting up your datasink? See more of our documentation on our site.